Preparing your floor properly before tiling is the most important part of the job. A clean, level surface helps tiles stick firmly and last longer. The good news is, it doesn’t have to be a back-breaking exercise. With the right tools and a bit of planning, you can get the job done quickly and safely without overdoing it. This guide walks through the simple steps to get your floor ready for tiling at home.
Step-by-Step Floor Preparation for DIY Tiling
Good preparation makes tiling easier, faster, and longer-lasting. The steps below outline what you need to do before you start laying tiles. You don’t need specialist skills, just patience and attention to detail. Taking the time to do this right will save you from cracked tiles and uneven finishes later.
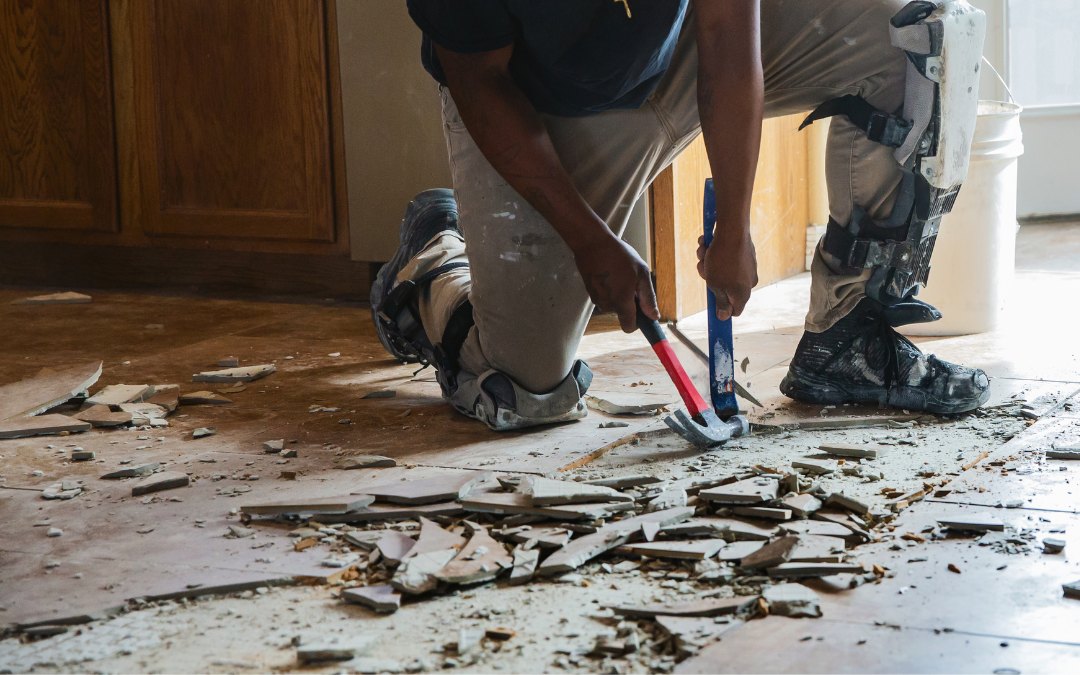
Step 1: Clear the area
Remove furniture and any old flooring such as carpet, vinyl, or tiles. Check the subfloor for damage or damp spots before moving on.
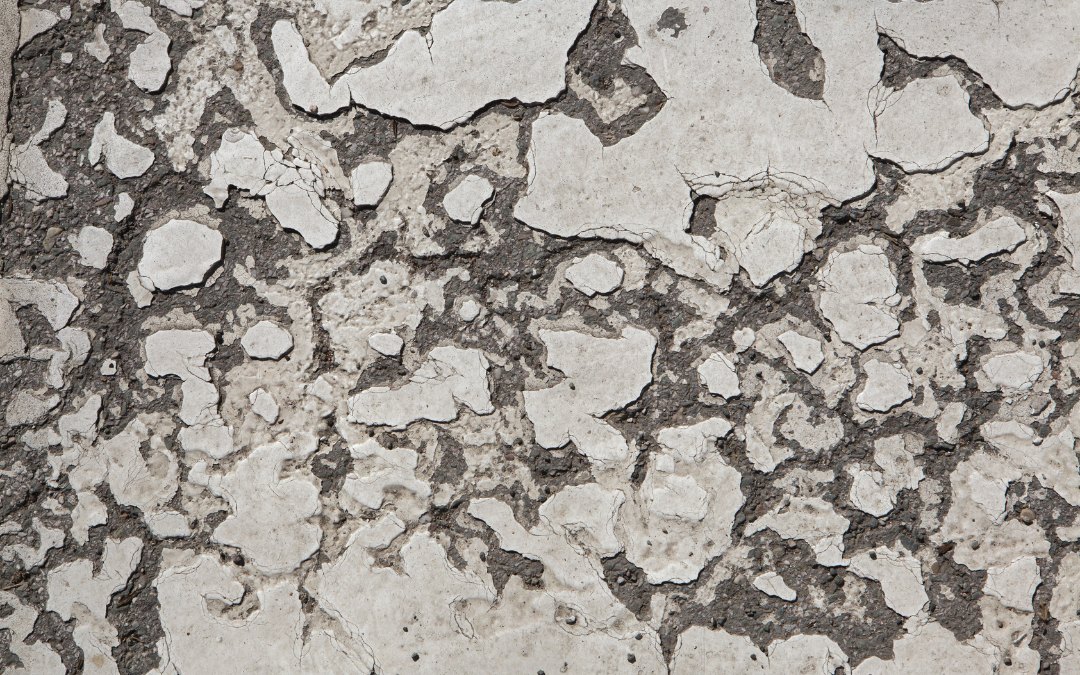
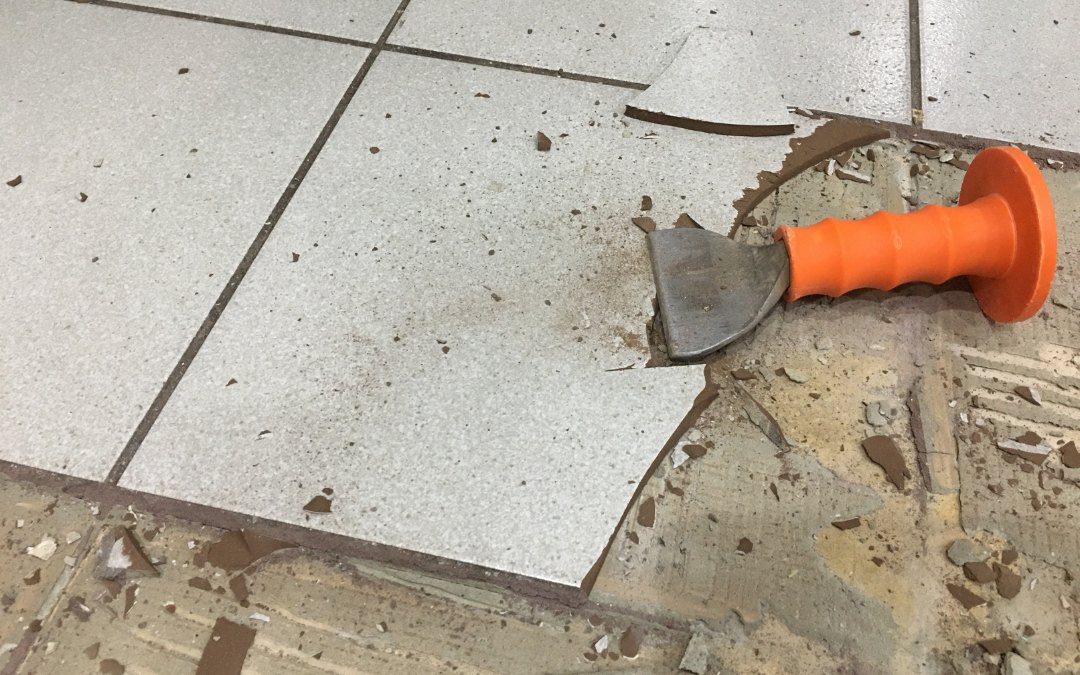
Step 2: Remove glue and residue
Old adhesives, paints, or coatings stop tile adhesive from sticking. Scrape or grind them away to leave a clean surface.
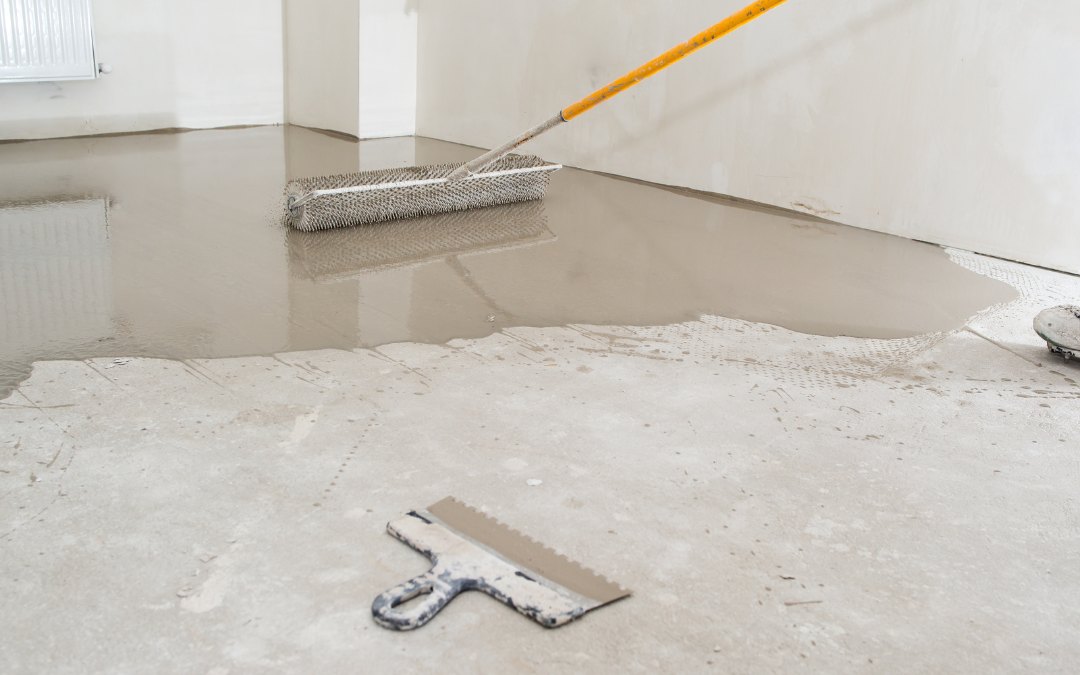
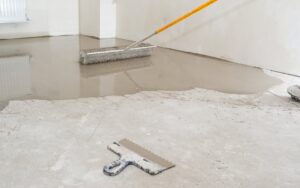
Step 3: Check the floor level
Use a straight edge or level to find dips or raised sections. Grind down high spots and fill low areas with a levelling compound.
Step 4: Clean and dry the surface
Sweep or vacuum the floor to remove dust and debris. Make sure the slab is completely dry before applying adhesive.
Step 5: Final inspection
Before you start tiling, confirm the floor is flat, clean, and dry. Remove any remaining dust or residue.
Proper preparation helps avoid loose tiles and cracks later on. For the right tools to make the job easier, visit our DIY Equipment Hire section or get in touch with the Concrete Hire team for advice.
When you request a quote, include the size of your area so our team can match the best equipment to your space and surface. It saves time, prevents guesswork, and helps you get the right tools for the job.
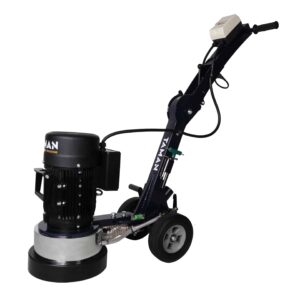
Equipment Used